Making of Uro House
I’m happy to bring you a short new tutorial by Luis Linares from Kuan Studio. In this article he will describe the creation of the Uro House image posted not long ago in the Finished Work section of the forums. It was very interesting for me to know more about the post process done on this image since there is a big difference between the pure render output and final result. Kuan team was very kind to share this process with us and I hope you’ll enjoy this article, learn from it and share your thoughts by commenting at the bottom of this article’s page.
Kuan Studio is a 3 people studio, Agustín, Luis and Rodrigo, located in Uruguay. ‘Kuan’ comes from wisdom book ‘I Ching’ which means contemplation, and that word identifies the studio’s style, the contemplation of the light, details, and materials. Kuan team uses AutoCAD and 3D Studio Max for modeling, VRay for rendering, Photoshop and After Effects for post production.
Visit Kuan Studio’s website at – www.kuanstudio.com
Modeling
All the modeling was done with AutoCAD, except the grass plane because the idea was to create an organic plane to make a realistic image. All the equipment (interior and exterior) and the vegetation were pre-made models for 3ds max.
Why AutoCAD? some of you might ask… the simple truth is we use it a lot in our architecture studies so it was natural to use it for 3d too. these days 3ds max get’s more and more modeling time as we get into more complex and serious modeling up to a point we might use just 3ds max.
The imported AutoCAD model is missing the grass plane that will be added in 3ds max later as you can see below.
Textures
All the materials in the scene are VRay materials.
Grass
For diffuse we use a RGB Tint map. And VRay Displace modifier is applied to the plane.
Back Wall
VRay Material with a MIX map in diffuse slot. The point was to get a dirty white wall.
Glass
VRay Material with pure white in refraction and 35 in the reflection slot.
Camera
We use a VRay Physical Camera with a neutral white balance, no vignette and vertical correction.
Lighting
The lighting was done with three main lights:
- VRay Light Dome with a bitmap to get the blue light of a typical afternoon.
- VRay Light planes with different multipliers to accent the interiors and exterior.
- Photometric lights for the exterior walls.
Render Settings
For global illumination we used Irradiance Map and Light Cache with a value of 1200, Catmull-Rom and Adaptive DMC for antialiasing.
Post Production
We use Photoshop, After Effects and Magic Bullet Looks plugin for post-production.
The background image was made of the composition of three different images. A sky and two images of mountains, then color corrected for the right illumination (Hue-saturation, Contrast-Bright, and color balance).
Some passes were applied to get better contrast and illumination. Ambient Occlusion was applied to get contrast and highlights borders and planes. VRayReflection to highlight the reflections. VRayLighting to control and get better illuminated areas. VRayMatteShadows to control the shadows area.
We put some different vegetation in Photoshop with adjustment layers to get the correct illumination with the ambience.
Now we use Magic Bullet Looks for the final retouches of the image.
And finally we apply vignette effect in After Effects to get the image done.
Hope you enjoyed this article… Cheers,
Kuan Team.
Luis’s original Uro House render thread
You are welcome to comment on this article and ask questions using the comment box below!


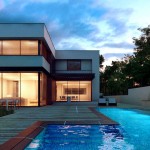
Hi all, thanks to Ronen to let us share this, hope you like it, helps all of us to get better!
This image was made by Agustín Gutierrez, and all the patience to make the tutorial, all the thanks to him.
Cheers!!
Thank you very much for sharing the workflow, great job by the way.
If you don’t mind i have some comments / questions, In what type of Blending mode are blended the Render passes (as i know the Ambient Occl. in Multiply, but the other ones?).
You talk about the Back Wall of concrete but as far as i can view i can’t appreciate this material / dirt in final render…
How did you deal the 4 lights under the main ceiling? there isn’t light in the pure render and it’s a lot in the final image.
Like Ronen points the post process is really critic for the final image result!
Congrats and keep the good job.
Best regards.
Hi Peprgb, thanks for your comments!
About the passes, there`s no one way to use them. Sometimes we use screen blend, soft light, testing to get the best option. I know in this image you can’t appreciate the dirt, the original one was 3500 pixels wide, and there was a lot of detail.
About the final question I don’t understand what you mean, can you further explain?
Thanks!
Ok… got it.
About the ceiling lights I mean that in pure render the lights hasn’t “light/bright” (marked with green) so it’s post production i guess?
here is a link to the image i refer to – http://maldda.com/tests/uro_h.jpg
Thank you very much for your kind reply 🙂
thanks, I love your blog and thanks original maker too!!!
Excellent brought, I really love this kind of renders
Thanks to all for the comments!
Peprgb, about the lights, yes, you are right we lift up their bright with post production, and blending with lighting pass
🙂 Cheers!
Nice renderings. Thanks for the work flow / making of.
One more question, did you also change the gama to 2.2 in the max setup. That is Customize > Gama settings.
Just wanted to say that this house is also a good HOVER example 🙂
Hi, thanks for the comments, Girish, you are right this is in linear work-flow with the gamma in 2.2 we forget to say that…
😉
Great explanations! And beautiful image.
How do you use the render passes? you mentioned that there’s no way of using it. what’s the reason for producing it?
Hey Jay
Luis said there is “no ONE way” of using the multi-passes…
In Photoshop new layers are by default “normal”, but if you look at the drop down menu at the top of the layers palette you will see options such as “screen”, “soft light”, “overlay” etc. You can find lots of tutorials on the net.
great job!
greetings from tijuana, mexico.