Making of House at Paros
Dimitris Batis shares valuable insight about creating a Mediterranean Style scene based on his Paros Homes project. In this short article he will focus on the walls modeling and material, rocks and general lighting creation.
I found these Paros images so captivating and capturing the Greek island feel so well, I asked Dimitris to share a few quick and focused tips about these scene. It is not the usual in-depth making of article, but good grounds for starting a discussion about it and giving you the chance to ask more about the work that was done here so well.
Enjoy!
Author: Dimitris Batis
We were commissioned by Paros Home Constructions, a construction company in Greece, to make 3d photorealistic presentation of a traditional residence, in the beautiful island of Paros, in Cyclades, Greece.
This particular project was a bit odd in that the plot of the residence was located far away from the sea. For this reason, we decided for the 3d images to focus more on the building than the views from the building on its surroundings. A view that every house – in an island – could have had.
The project was also challenging from two other points of view. The first is that the photorealistic presentation had to be extremely realistic in order to match the commercial needs of the project.
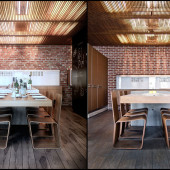
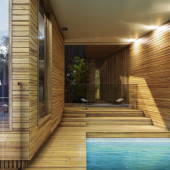
The second challenge for us was to achieve depicting the feel of a traditional Cycladic house, without having an idyllic horizon and a spectacular view of the Aegean sea. You can see some of the look and feel of the place in the mood board up above.
Generally speaking, I think that we managed to deal with these difficulties successfully. The 3d application gave us the ability to achieve the environmental planting of the building plot as well as the building technique method of construction which was one of the most difficult parts of the project.
Last but not least, an equally important aspect of the project for me was the lighting. The images had to be realistic enough to capture the feeling of a traditional Cycladic house in the heat of a summers day, under the beautiful blue sky at noon. I believe that the final result shaped this familiar image to all of us, the Greek people.
Modeling
1. Creation of Traditional Realistic Masonry
An important part of the modeling was to realistically present the masonry of the project. This must not have sharp corners but quite smooth ones with embossed surfaces.
I started with a very simple box model of the shell walls, with properly positioned basic edge loops derived from all the corners and holes intersections.
More edge loop were introduced into the model to allow for a proper smoothing process of the mesh.
The Turbo Smooth Modifier made it easy for us to handle the geometry bringing it exactly where we wanted. A disadvantage was that a lot of polygons were produced but we got over this with the iso-line display.
Finally, we used a noise modifier to create uneven shapes on the masonry.
2. The Fence of the Compound
In the same way, we dealt with the fences on the projects perimeter. The bottom of the fence is simple geometry with a subdivide and a VRayDisplacement modifier to adjust the stones texture while the upper part, the top of the fence, had to look more molten and embossed and embrace the fence.
Environment
1. Rocks
I used the Rock Generator Script by Alessandro Ardolino to make the rocks in my scene.
Alessandro created this great script being inspired by a great tutorial by Sasha Henrichs published on Autodesk AREA and embedded here too.
You can also learn more about rock creation by following Daniel Hattons Realistic Rock Creation Tutorial Part 1
And Realistic Rock Creation Part 2
2. Scatter
To produce my grass I used the MultiScatter plugin which facilitated its management creating a variety of grass with both dry and green kinds, various bushes and short trees resembling the ones that are in the projects area but also for the depiction of summer in Greece.
Textures
1. Walls
The most difficult material to depict was that of the wall. We had to create a clean white color that suits the style of the region, but one that will not washout and have the little imperfections such wall surfaces have.
You can se the diffuse and the map we used for both bump and reflections below as well as the general material settings.
2. Stones
We had to stress the joints of the stone which constitute the fence and we achieved that by using the displace maps in Photoshop.
Another approach to this would be to use the Stone Placement Tool Script by Alessandro Ardolino to build such a stone wall from actual geometry. I didnt have these walls near camera too much, so the texturing solution worked pretty well.
Lighting
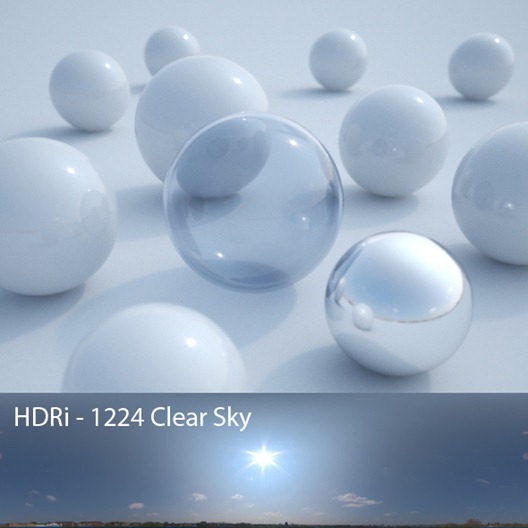
To depict the lighting we used an EXR file made by Peter Guthrie (EXR 1224).
By combining a VRaySun and VRay Dome Light we were able to show the summers midday sun in Greece.
Render
The final renders were meant to be in a commercial handout thus the resolution had to be high in 3508 x 2480 pixels. Being pressured by time, the render resolution had to be done quickly without too much impact on the quality of the images.
Thats it!
I hope this short article offered you some insight into my work and that it will help you, even if little, in your own work.
Cheers,
Batis.


thx for sharing!
pretty cool! Nice Cactus :-]
You forgot to mention the camera settings…please do tell us the settings.
Thankx
realy nice tutorial
can you post your test setting for the render (the one you use when you are tring light and texture
thanks
Thank you Your images looks photo real 🙂 Could you post your camera settings? and could you be kind enough to tell me what grass and bushes you have used? Thanks 😉
@Dollmaker I used grass from ICube with multiscatter and the bushes also
but changing a lot the materials.
very nice!can you tell us about rendertime and what you’ve done in the postthx from berln
@ThomasGruender The render time was about 3 hours for each image.For post i used ps for basic color correction (used curves and color balance).
ups no lineends…sorry
i Love it! thank you very much Ronen for all theTutorials that u make.always happy to see more like this one (the Modeling Part)
please shre the camare settings
@BrunoDaSilva I used Vray Physical camera with default settings except
the Day Light as white balance.
I LIKE THIS WORK AS MUCH AS DESIGN LIKE RENDERING NOW YOU WANT TO KNOW AS IT WAS THE CAMERA THAT THEY USED
@EduardoFeliu Thank you for your comments. I used VRay Physical Camera.
hi, how you can use both sun shadow and hdri shadow ? you use hdri as envirenment and reflection texture ? and you adapt the sun oriention to hdri sun ? excuse may englih 🙂
@samanoski See the following link.
http://www.peterguthrie.net/blog/2010/04/vraysun-and-hdri-sky-tutorial/
hi great work thank’s for sharing . Over all your vegetables feel greats! May you share other information? how many type of species are here, in tot. how many istances populate your immages….rendered with how much memory….and so on. Thank’s in advance
Dimitris very helpful ‘making of’ Cheers!
Simple and quite Neat Project 🙂 Love the Cactus though 😛
Well Ronen ,
it would be really helpful if you could please make a Thread on Some Everyday useful Scripts for Interior & Exterior Renderings . Like StoneGenerator Scripts , Floor generator & Etc 🙂
Would be really appreciated 🙂
thos images are perfect specially the illumination, i saw something about the materials of the grass, i have the same ones but dont use them because hte materials, could you share some of the changes that worked for u?
those renders are great, specially the illumination, i have iqube grass too but dont use themb because the materials, ive read about you change them, colud you give som clues abut that? tnks
Nice Work and good tutoria 🙂
can i ask you something?
shrubs in the scene, you did or did you get some library?
I am very interested especially those who are on the outside of the property,
I live in a desert with vegetation like that.