Making of “Another Point of View” by Nicole Romano
The winners of the “Another Point of View” competition held in February this year at Universtità Iuav de Venezia (IUAV) and sponsored by RebusFarm were announced in May and today I’m publishing the making-of the first place winner image. Nicole Romano is an architect and construction engineer, student of the Master in Digital Architecture (MADI_V Edition) at University IUAV of Venice. Currently, on internship at Squint Opera (London) as a 3d Architectural Visualizer.
Introduction
Hello everybody!
I’m very honored to share my work for the “Another Point of View” competition with you here on Ronen’s blog! Big thanks to Ronen for this opportunity.
I’ve done this project for RebusFarm Rendering Competition “Another Point of View” organized for MADI (Master in Digital Architecture at IUAV) students. I’m super happy this won first place!
The image was created using 3D Studio Max for modeling, Corona Renderer as Render Engine and Adobe Photoshop for Post Production, only to adjust the lighting (exposure, contrast, etc).
References and Concept
For the contest, we had to pick a photo of a master in architecture photography and change the point of view, in a very broad sense. The one I chose is an “Interior View of Heliker” took by Walker Evans back in 1962.
The main idea was to use a mirror to give the same perspective to the viewers but overturned.
Here are some images that inspired the mood of my picture.
3D Modeling
First of all, I rebuilt the interior environment according to the reference, paying careful attention to the perspective of the photo and lighting arrangement.
The model was quite simple, I have just used some boxes to create the three rooms, modified with Edit Poly method in order to have openings. Also, the furniture has been made with the help of simple editable poly modeling, taking care to have as low polygon count as possible.
The more complex object to be modeled in the scene was the teddy bear.
Here are the steps of the 3d modeling process.
And how I used Corona Renderer Scatter to create its fur…
Using the Cobwebs Modifier
Finally, I added the cobwebs, as last detail, with the help of Cobwebs modifier by Joker Martini. You can find more information about this modifier on his website.
Materials
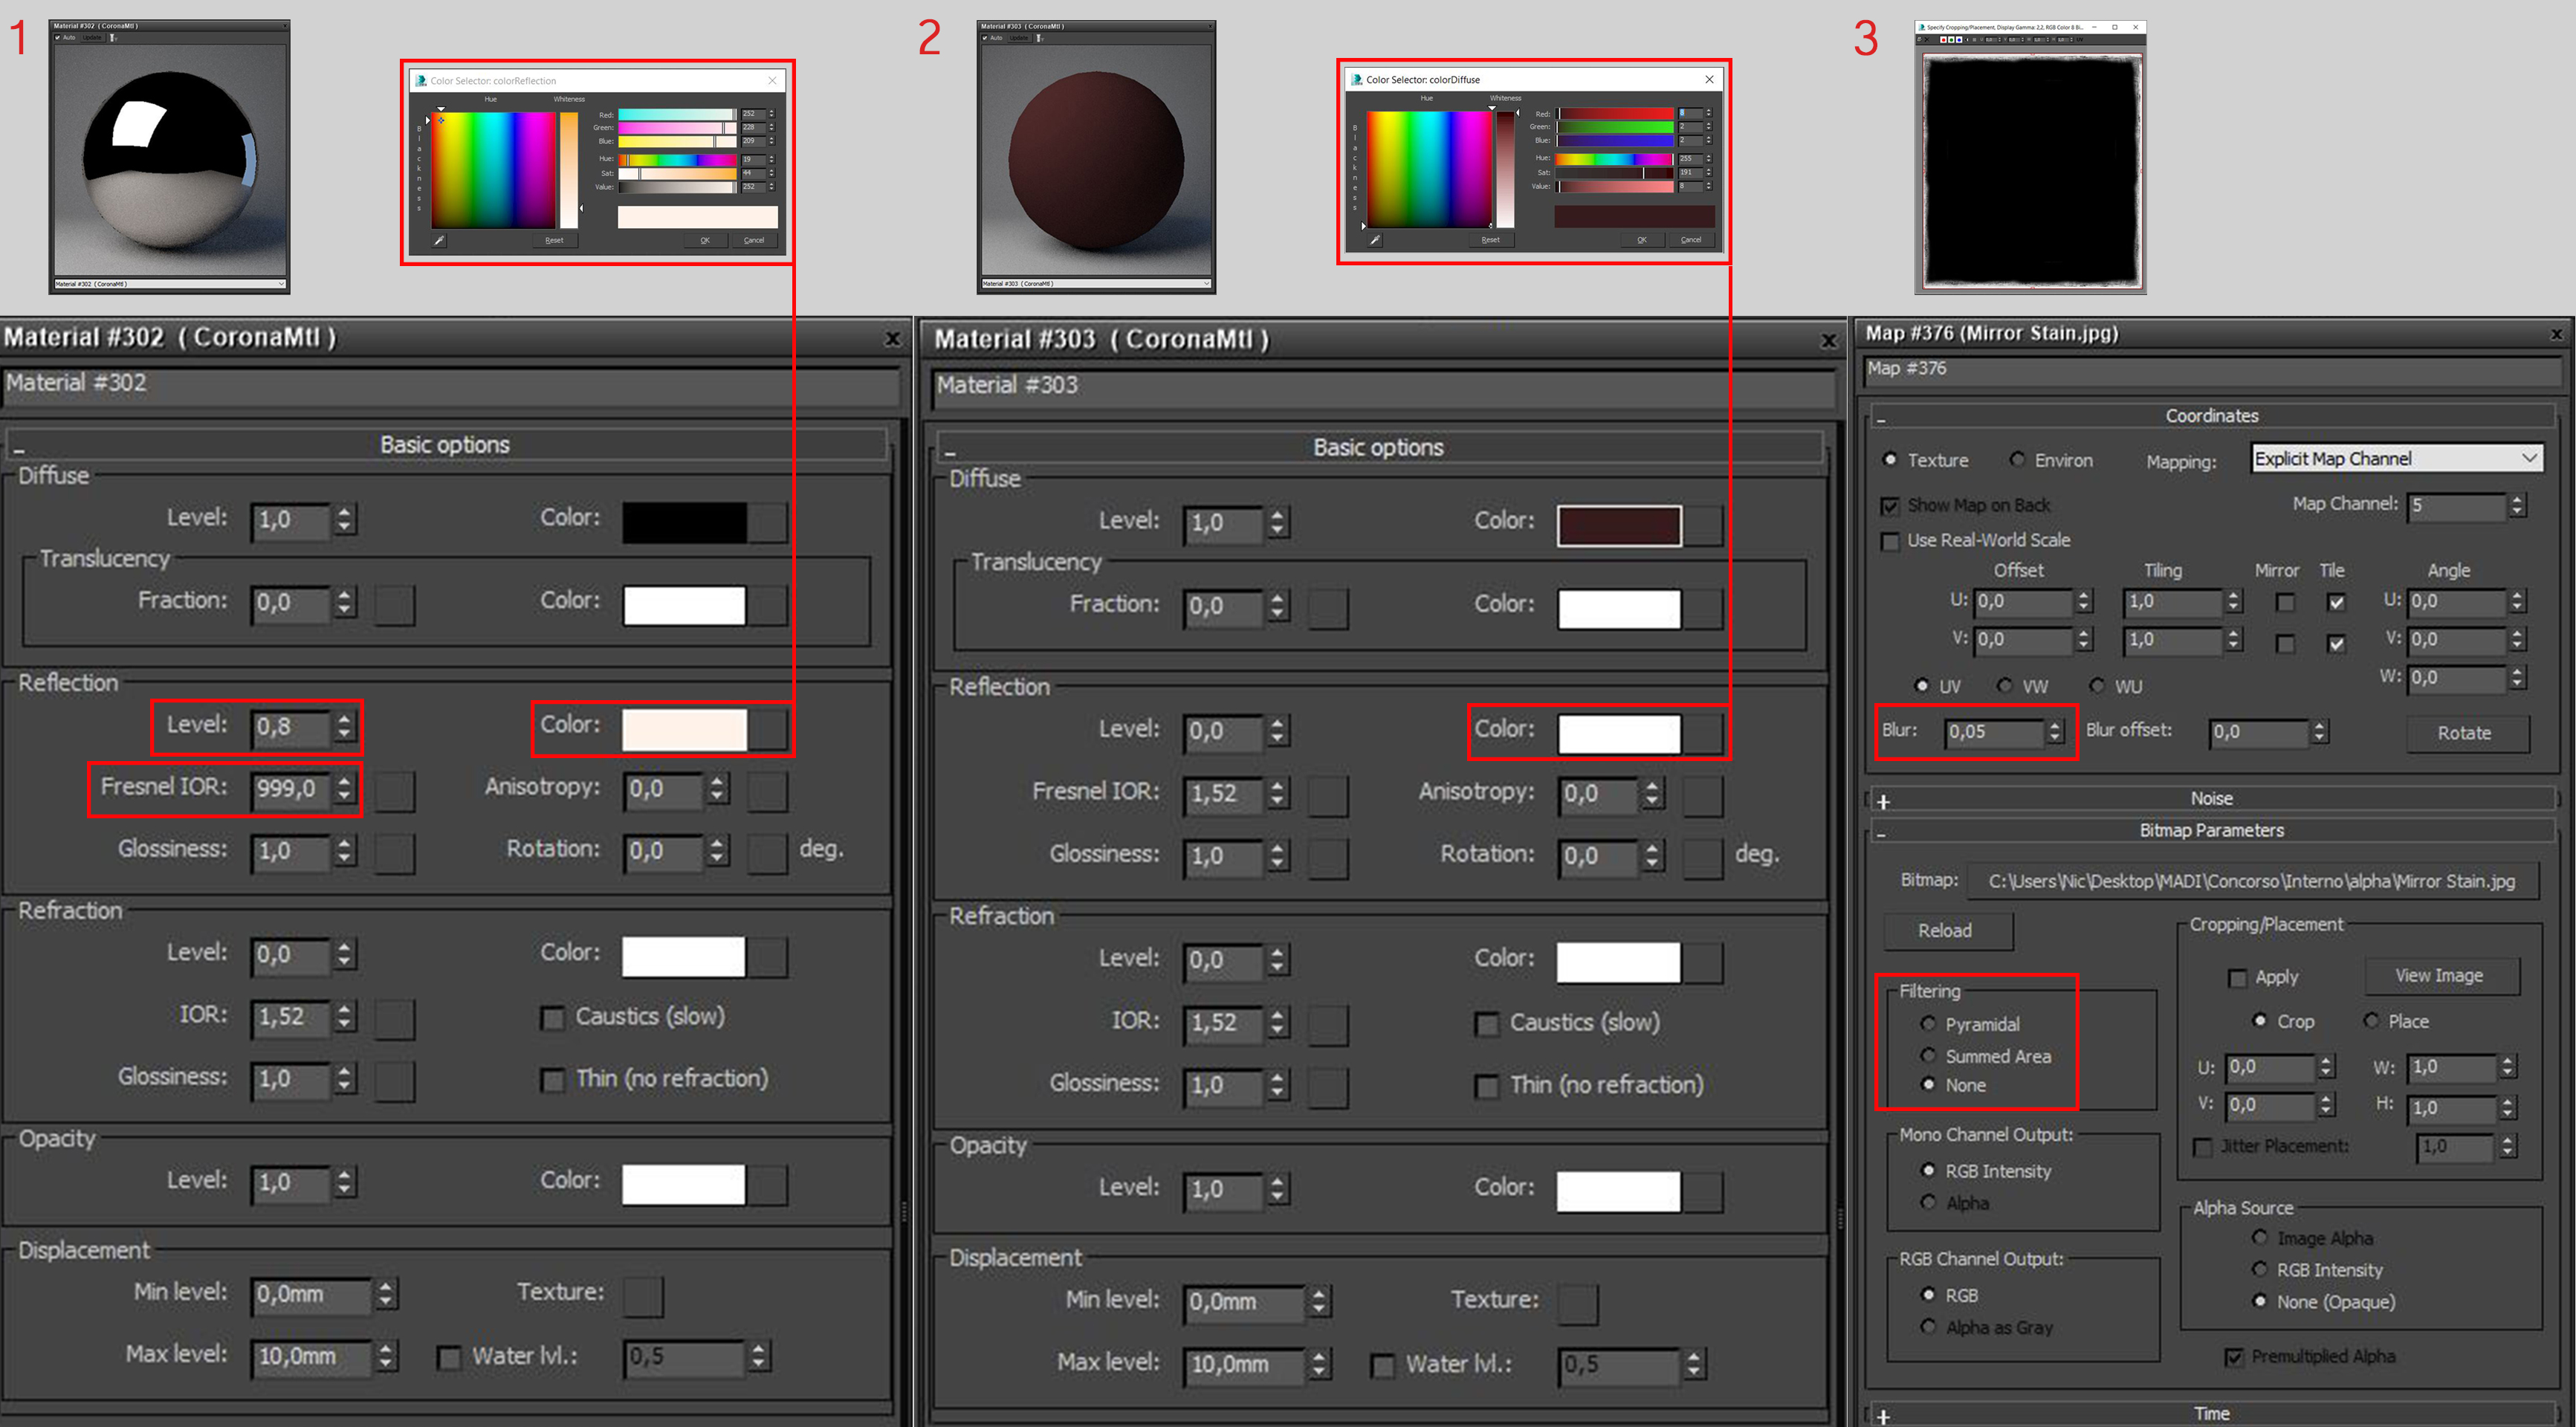
All the materials in the scene have been studied aiming to create the mood that I wished for my image. I imagined that nothing had changed since the time when Evans took his picture, so, I tried to make materials as they could look like after more than fifty years.
To reach this goal, almost all the materials are CoronaLayeredMtl and I composed them thinking about how the corresponding objects are effectively made in the reality.
Mirror Texture
Table texture
Wall texture
Lighting
The lighting is the most important element for all my images; I really enjoy studying its arrangement and playing with the shadows.
For this image, I wanted a warm atmosphere with diffuse shadows. It was enough placing a CoronaSun, properly oriented, and some rectangular CoronaLights.
Here are the general lighting setup settings…
I reduced the sunlight intensity, to avoid overexposed parts in the render. I preferred to have a darker final render and adjust the lighting in post production, where I could have a better control of the contrast between the shadowed and the enlightened areas.
Rendering with RebusFarm
The final image to deliver for the competition had to be rendered at RebusFarm with a maximum of 25 Renderpoints.
I had never used a render farm before, and I really advise it if you have very close deadlines or you need a support for your renderings.
It’s fast, safe and very easy to use.
https://us.rebusfarm.net/en/lets-go/video-tutorials
The Final Image
I hope that this article will be useful for you.
Thanks for your attention and enjoy!
Nicole.


WOW BREATHTAKING