How to PhotogrammeTREE
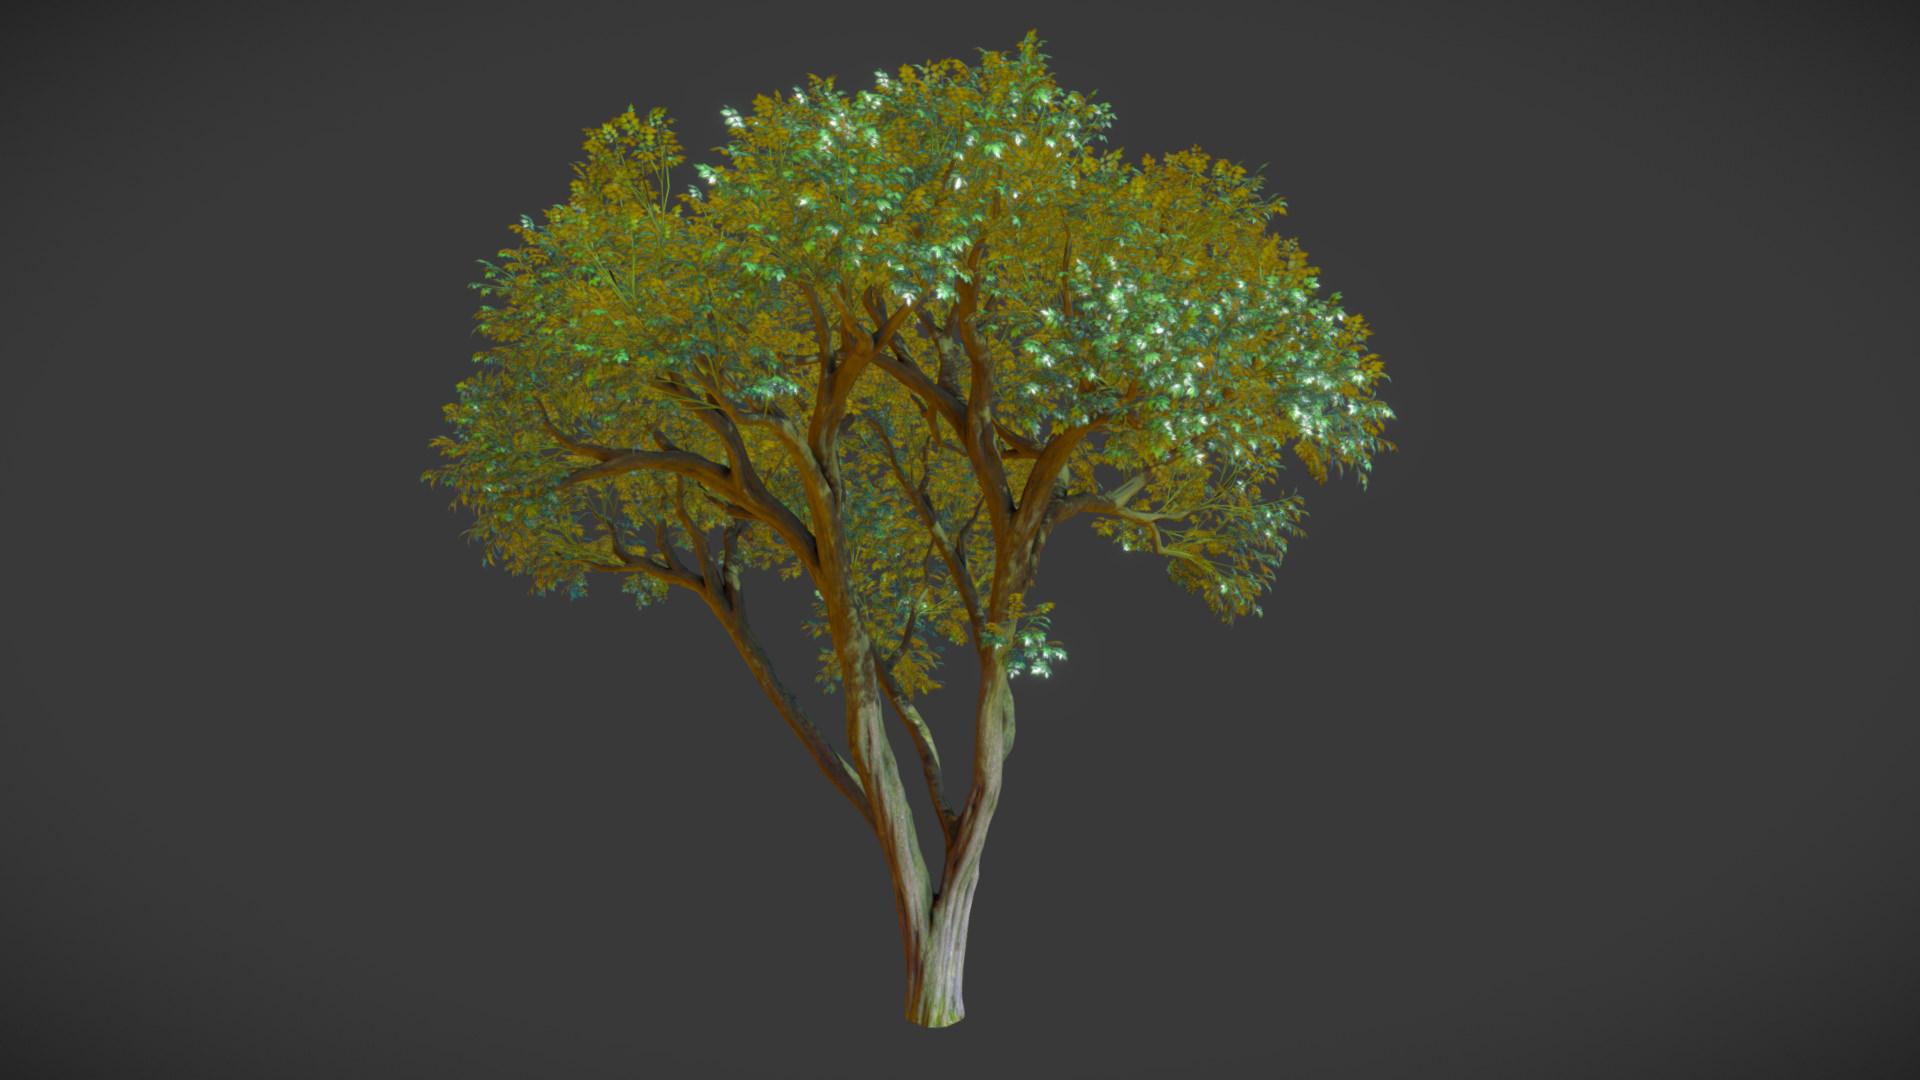
Keeping tabs on how to use photogrammetry in Architectural Visualization, I revisited The GrowFX Tree at the Archipelago House article by Radek Ignaciuk where he used GrowFX and replaced the Truck with one based on photos he took and thought about how others might do it? Looking at the gaming industry, I found an amazing looking tree done by Xiao Fei Li, a Senior 3d Artist in a gaming company. This is his process using photos, Zbrush, and great 3d modeling skills.
Introduction
Hi all,
I’m Xiao Fei Li, Senior 3d Artist currently working for Playdemic in the UK. Big thanks, Ronen, for the opportunity to write here!
I’d like to share some of my experience on photogrammetry modeling from my recent personal project.
I always have a great interest in photogrammetry. Although the incredible model generated from photogrammetry software, its high polygon count, and errors or missing details won’t allow you to use it straight away.
So this personal project is mainly focused on the process of transforming the photogrammetry result to a useful 3d model. And my final goal is to present it online in Sketchfab, so keeping it relatively low poly is necessary.
What inspired me are two videos I watched.
“Creating Natural 3D Environments with Alex Alvarez” on Gnomon’s YouTube channel.
and “Star Wars: Battlefront and the Art of Photogrammetry” on GDC YouTube channel.
Both of them show case studies of how the used photogrammetry in their projects.
Brief Workflow on Tree Photogrammetry
Before I dive into the process, here it is in short :
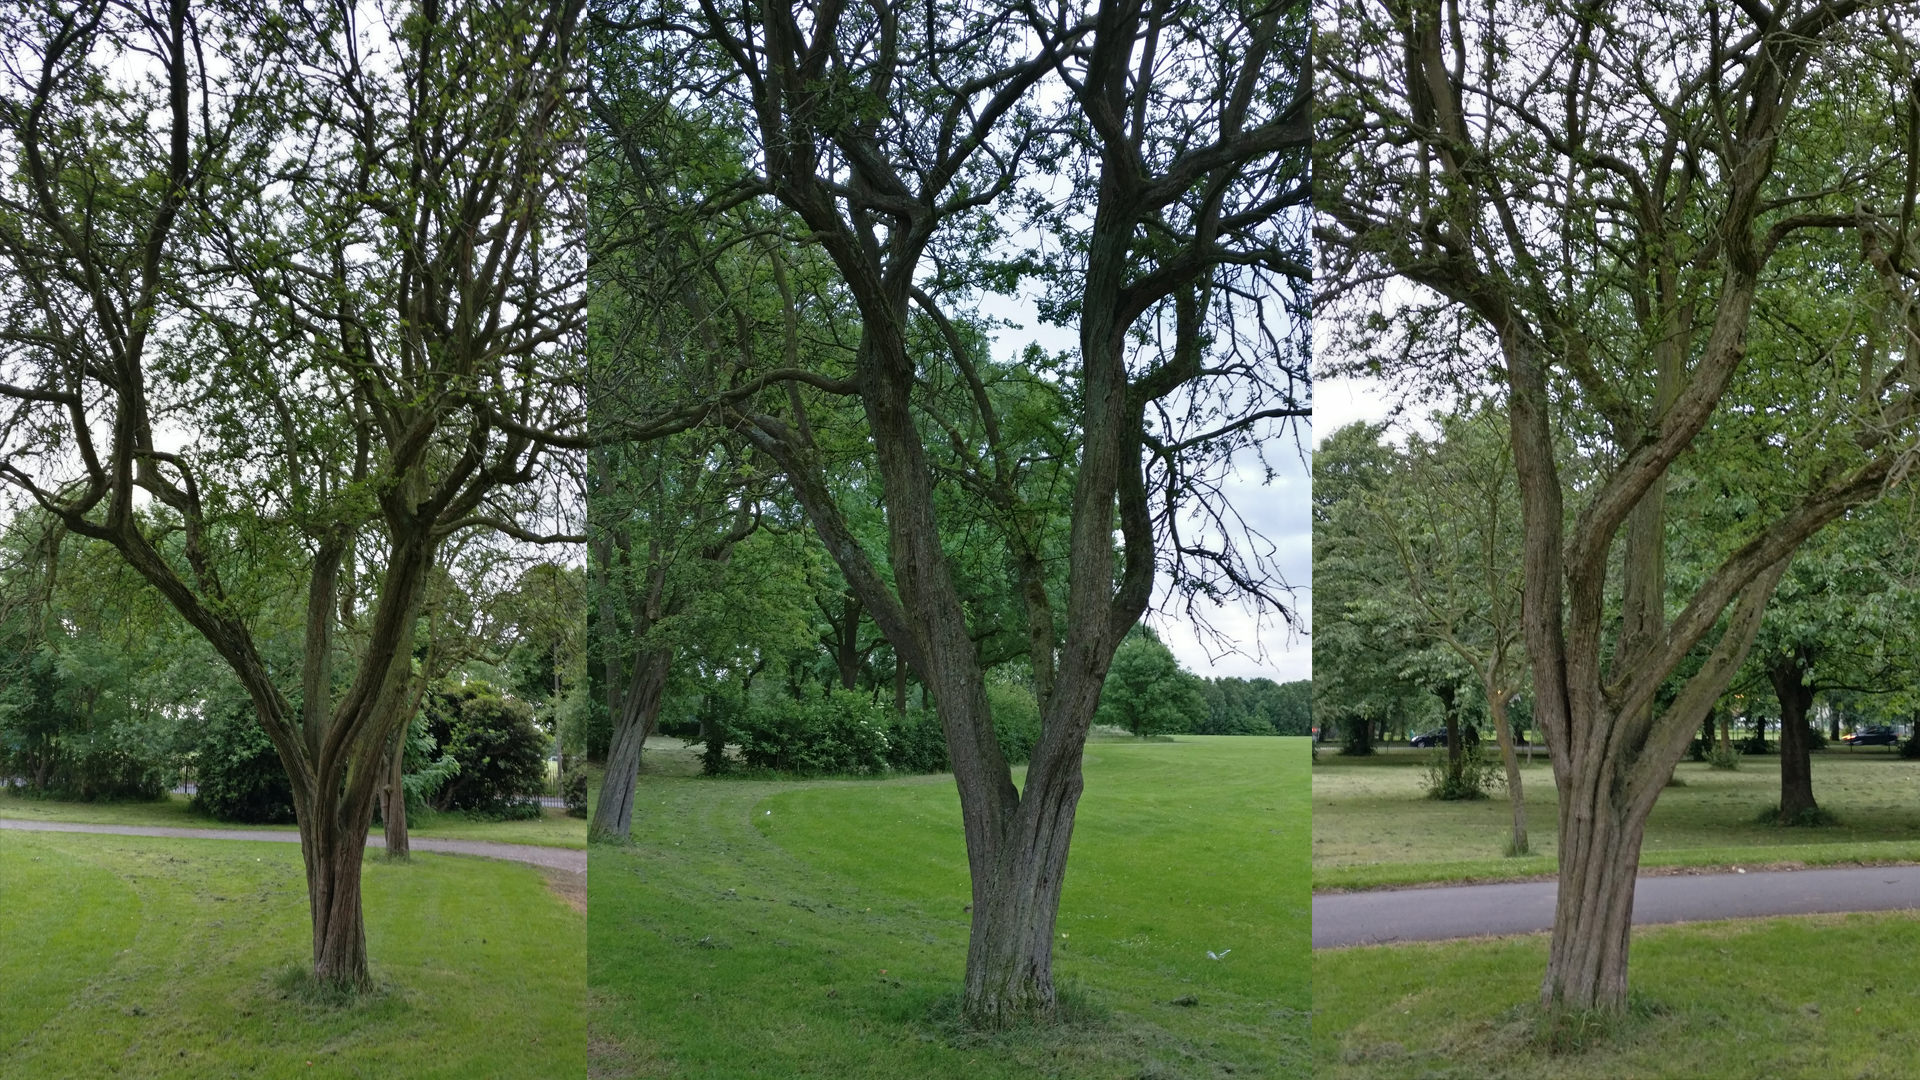
- I took photos of the tree trunk area from the ground to roughly above my head.
- Generated High and Low detail model from the photogrammetry software.
- Brought the Low low detail model into ZBrush for cleanup and creating the top main branches.
- Retopologizing the entire 3d model to a lower polygon model and unwrap it for baking the textures.
- The last step is creating small branches with leaves and placing them on main branches.
Part 1 – Photogrammetry
I used a Nikon D5100, very basic DSLR camera. Manual mode with shutter speed 1/80, f-stop 9 and ISO 200, so all the images have the same exposure. I wanted to take the photos quickly, and since the area around the tree was uneven, I did not use a tripod.
I chose a cloudy morning to take the photos. The lighting was soft and without strong shadows. That is good for the creating textures later on.
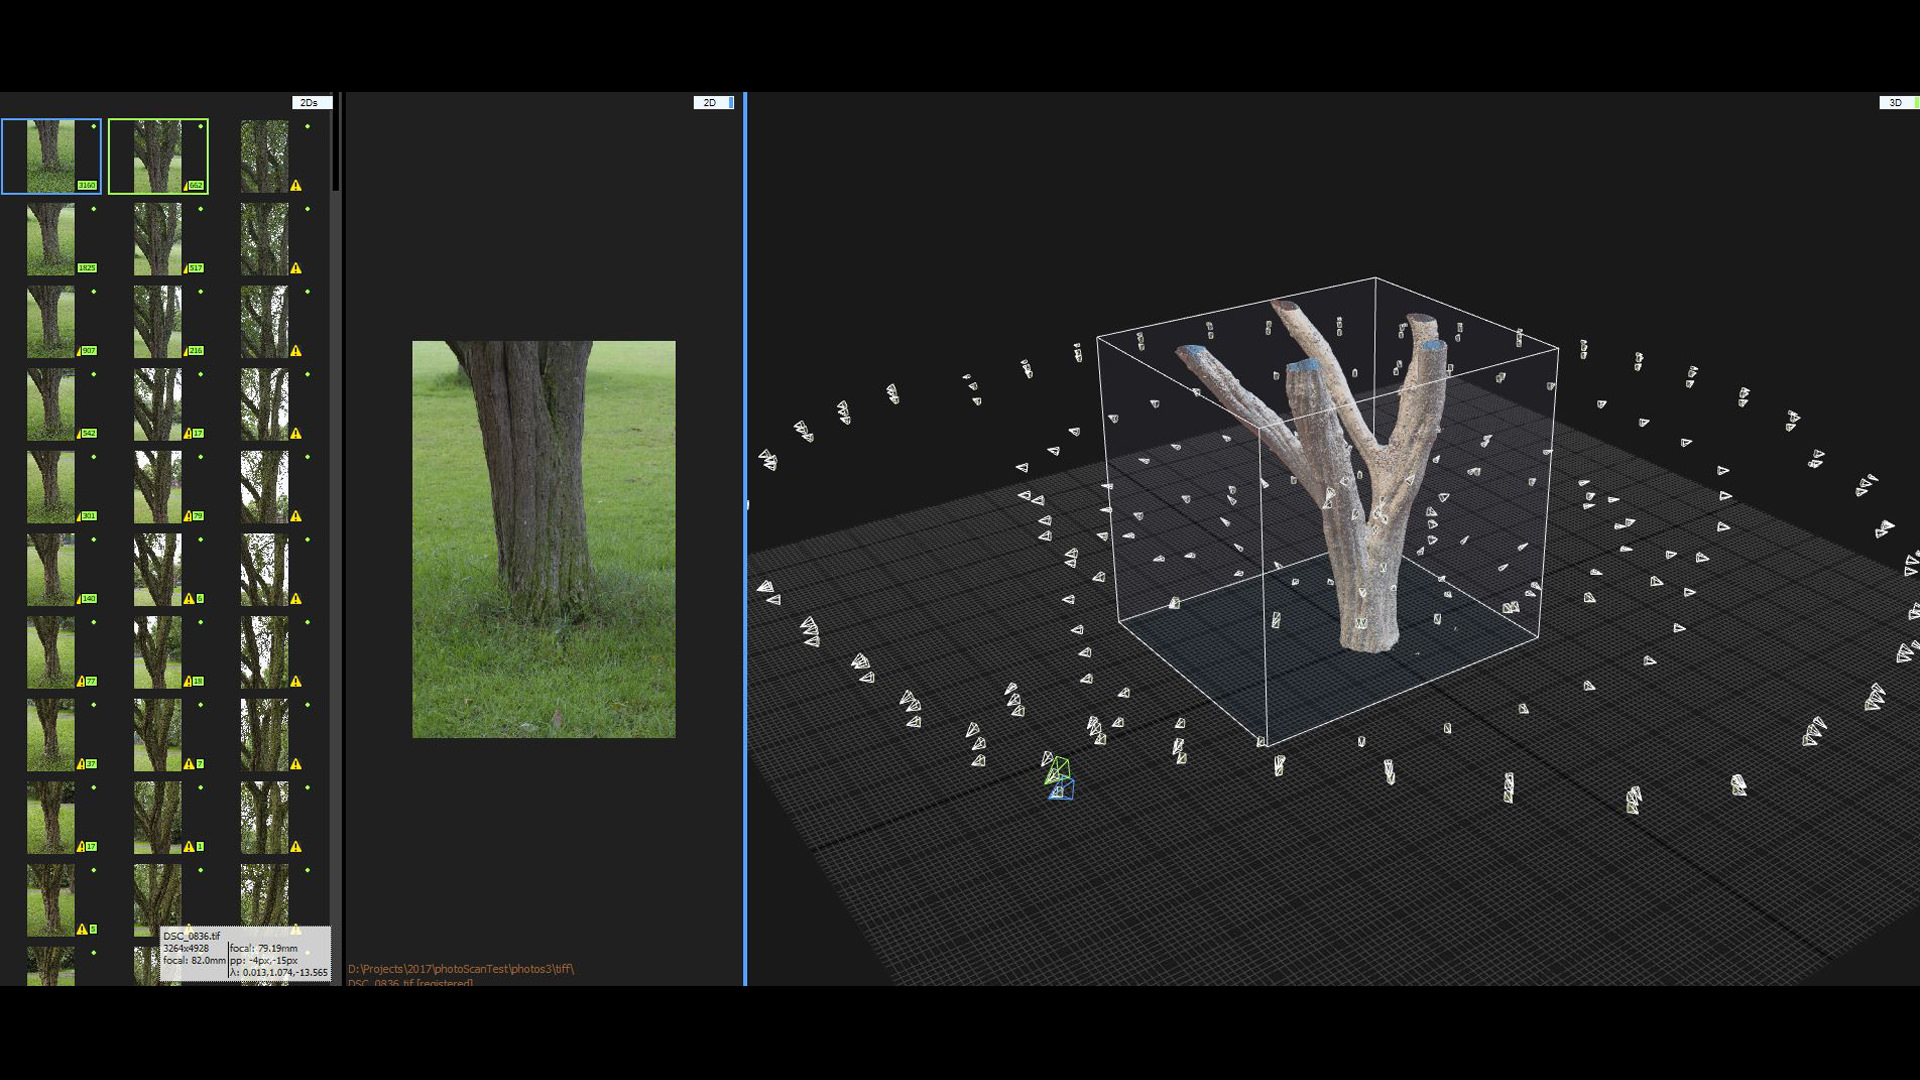
For this “PhotogrammeTREE” project, I have taken 282 photos. Multiple loops around the trunk and a few close-ups to cover the missing angle. I tried to keep the same focal Length, not sure if this is necessary though.
I only photographed from the ground to above my head area. Reasons are, I can only shoot the same area from a single angle and it starts covering with leaves which both are not helpful in generating the model.
Part 2 – Capturing Reality
I tried PhotoScan and RealityCapture before. Both of them are fantastic products, but in the end, I chose RealityCapture. The process in RealityCapture was basic but with most time spent on the model generating.
The process :
- Import the images,
- Align them up,
- Isolating the area,
- Construct into the 3d model.
From RealityCapture I exported two models. High detail model with diffuse texture for later baking of the bottom trunk surface texture. Low detail model (preview model) for the next step.
Part 3 – ZBrush, Cleanup and Top Branches Creation
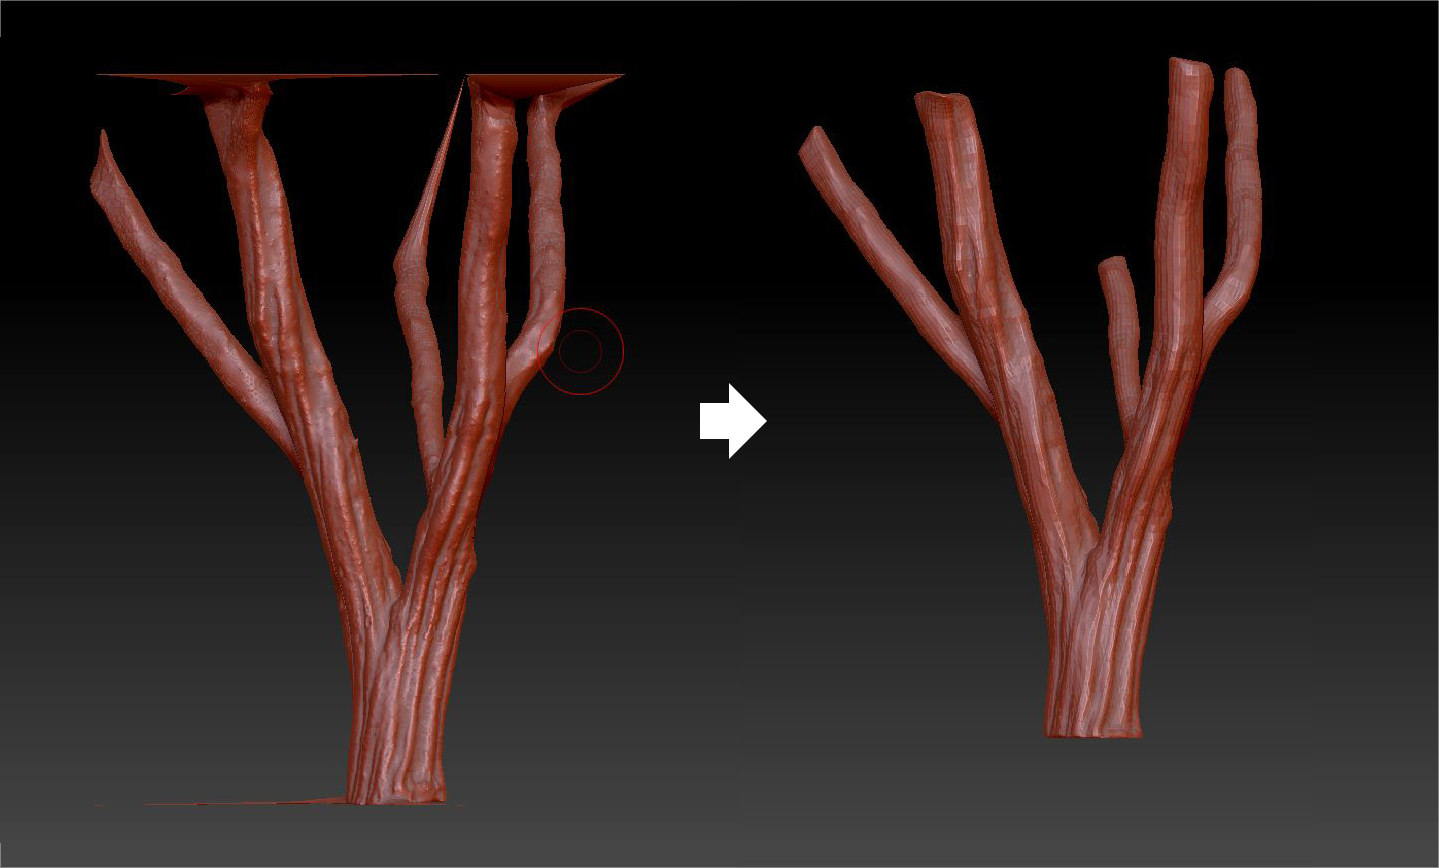
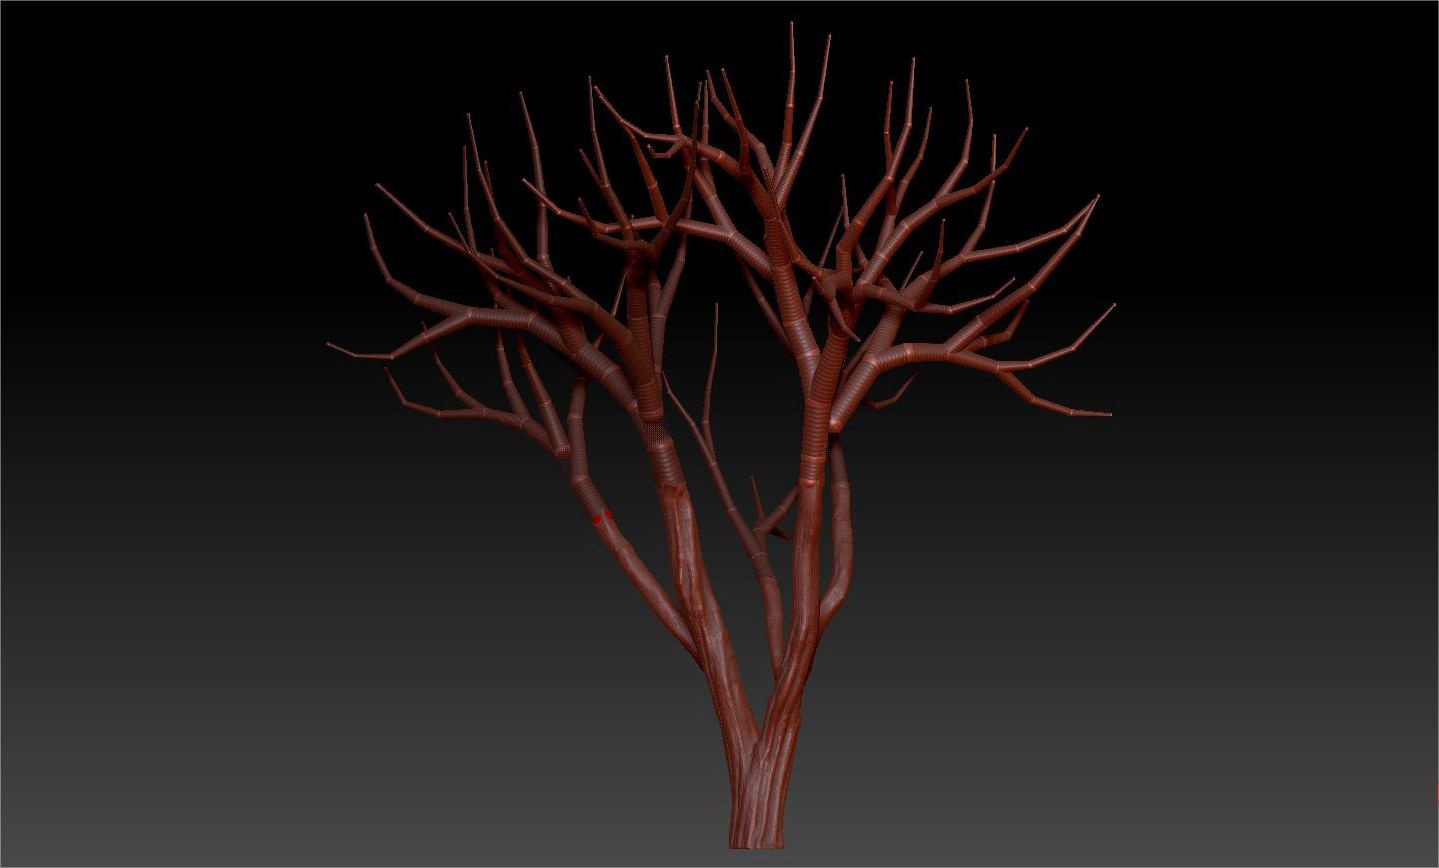
Import low detail model into ZBrush. The first thing I did was trim the messy area. Polycount at this stage is still too high, so I zRemesher the model to a suitable level.
The process from now is focusing on creating the top branch. Roughly based on the original photos, I used zSphere to block the branches from the bottom trunk. Convert them to a mesh, and when I’m happy with the result, merge them with the bottom trunk model.
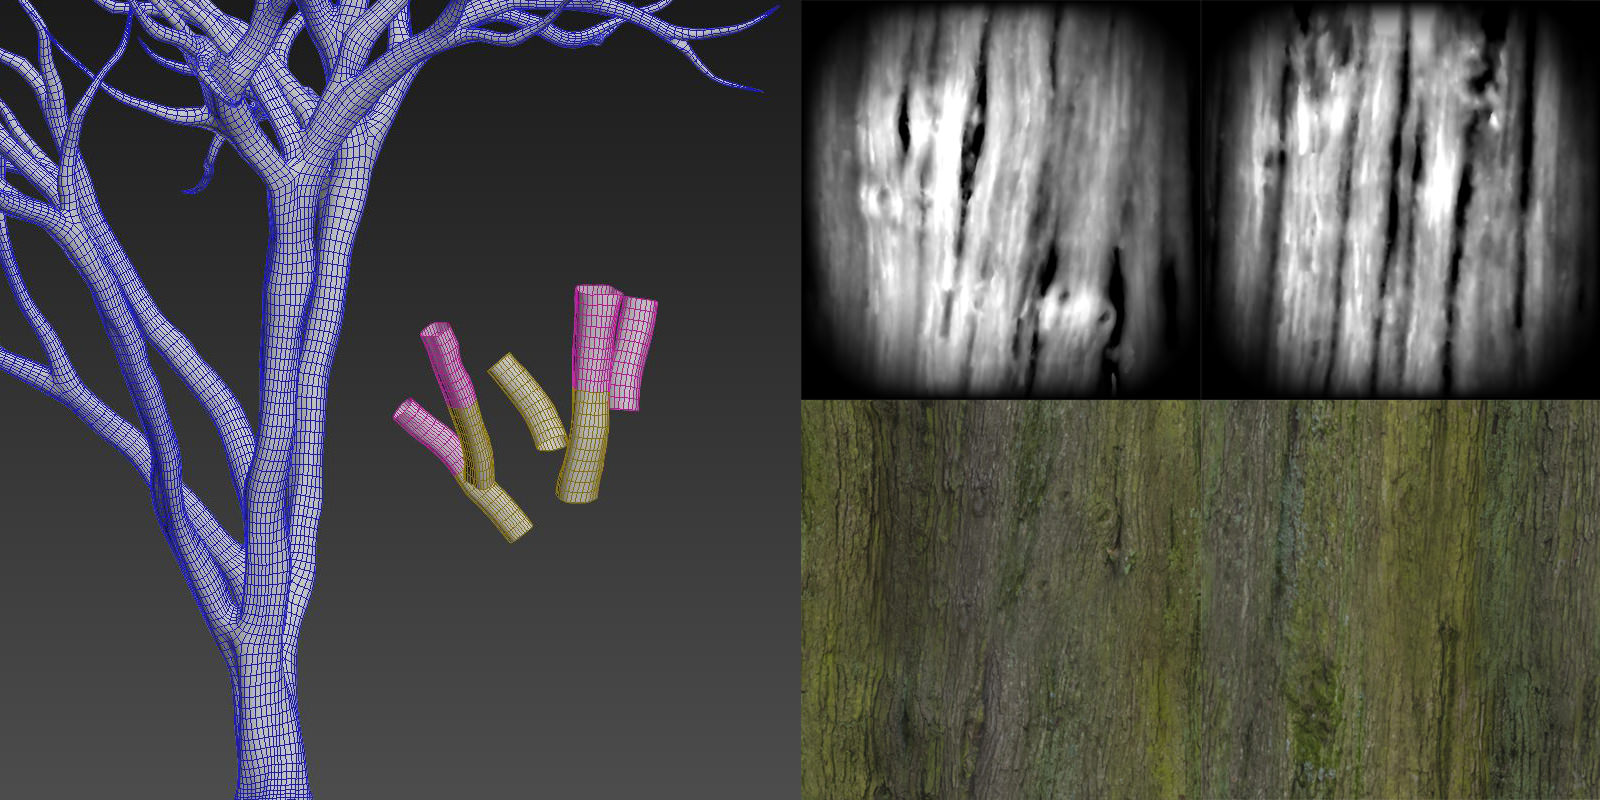
Then detailing the top branches. First, I cut out a few parts of the bottom trunk and used them to create a height map from the RealityCapture high detail model.
Then use them as a brush in ZBrush and reshape the top branches. It doesn’t take too much time as I thought, but I was pleased with the result. Then, poly paint the top branch using a similar method.
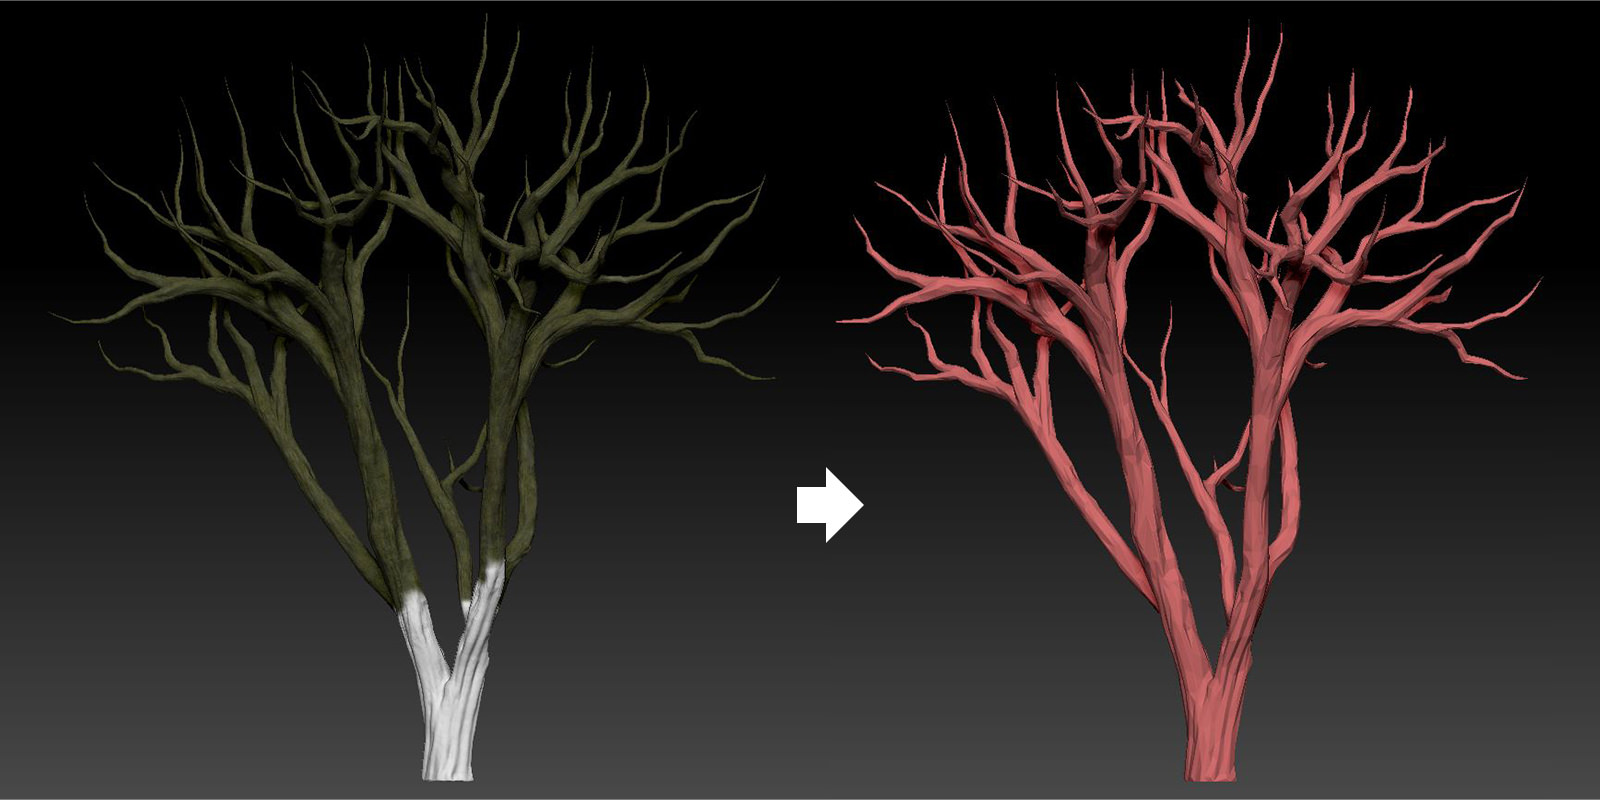
Now I have RealityCapture generated high detail model, and ZBrush created completed tree trunk with top area detailed and colored. Before baking all the maps, I need to lower down the polycount again for exporting the final 3d model of the tree, this time I used decimation master.
Part 4 – Textures
I need to bake two sets of textures. One for the bottom trunk and one for the top branches.
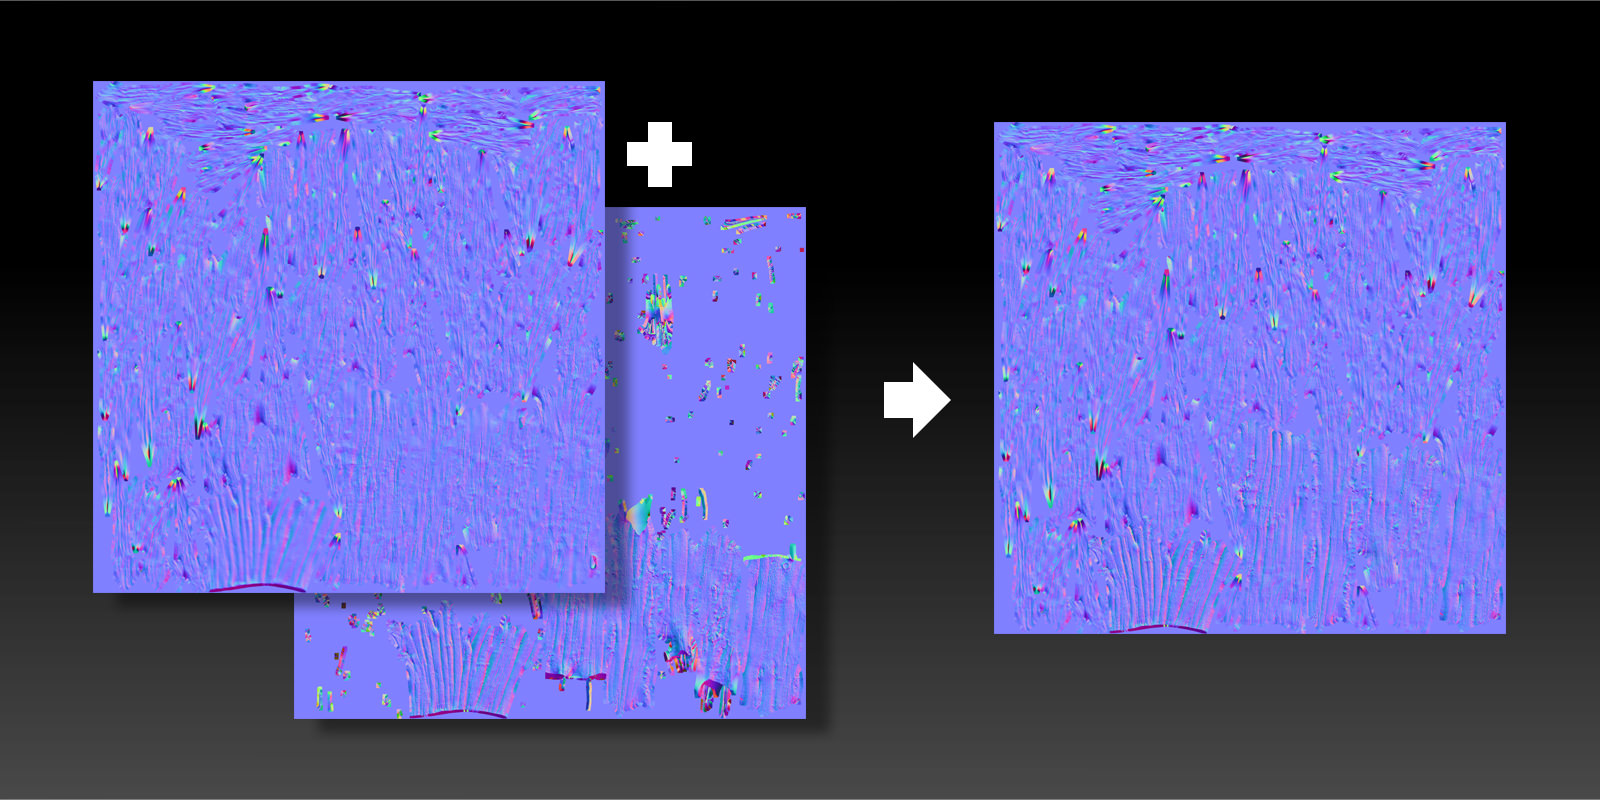
Using xNormal, I baked the normal, diffuse, ambient and captivity maps from the RealityCapture high detail model.
If I used the unwrapped final model as the base model to sculpting and poly painting from the beginning, the top branch texture baking would have been much easier. Instead, I projected the poly paint from the original model to the final model. Then, baking the poly paint to a diffuse map. Export the original model, and baked normal, ambient and captivity maps using xNormal.
Then piece them all together in photoshop.
Part 5 – Leaves
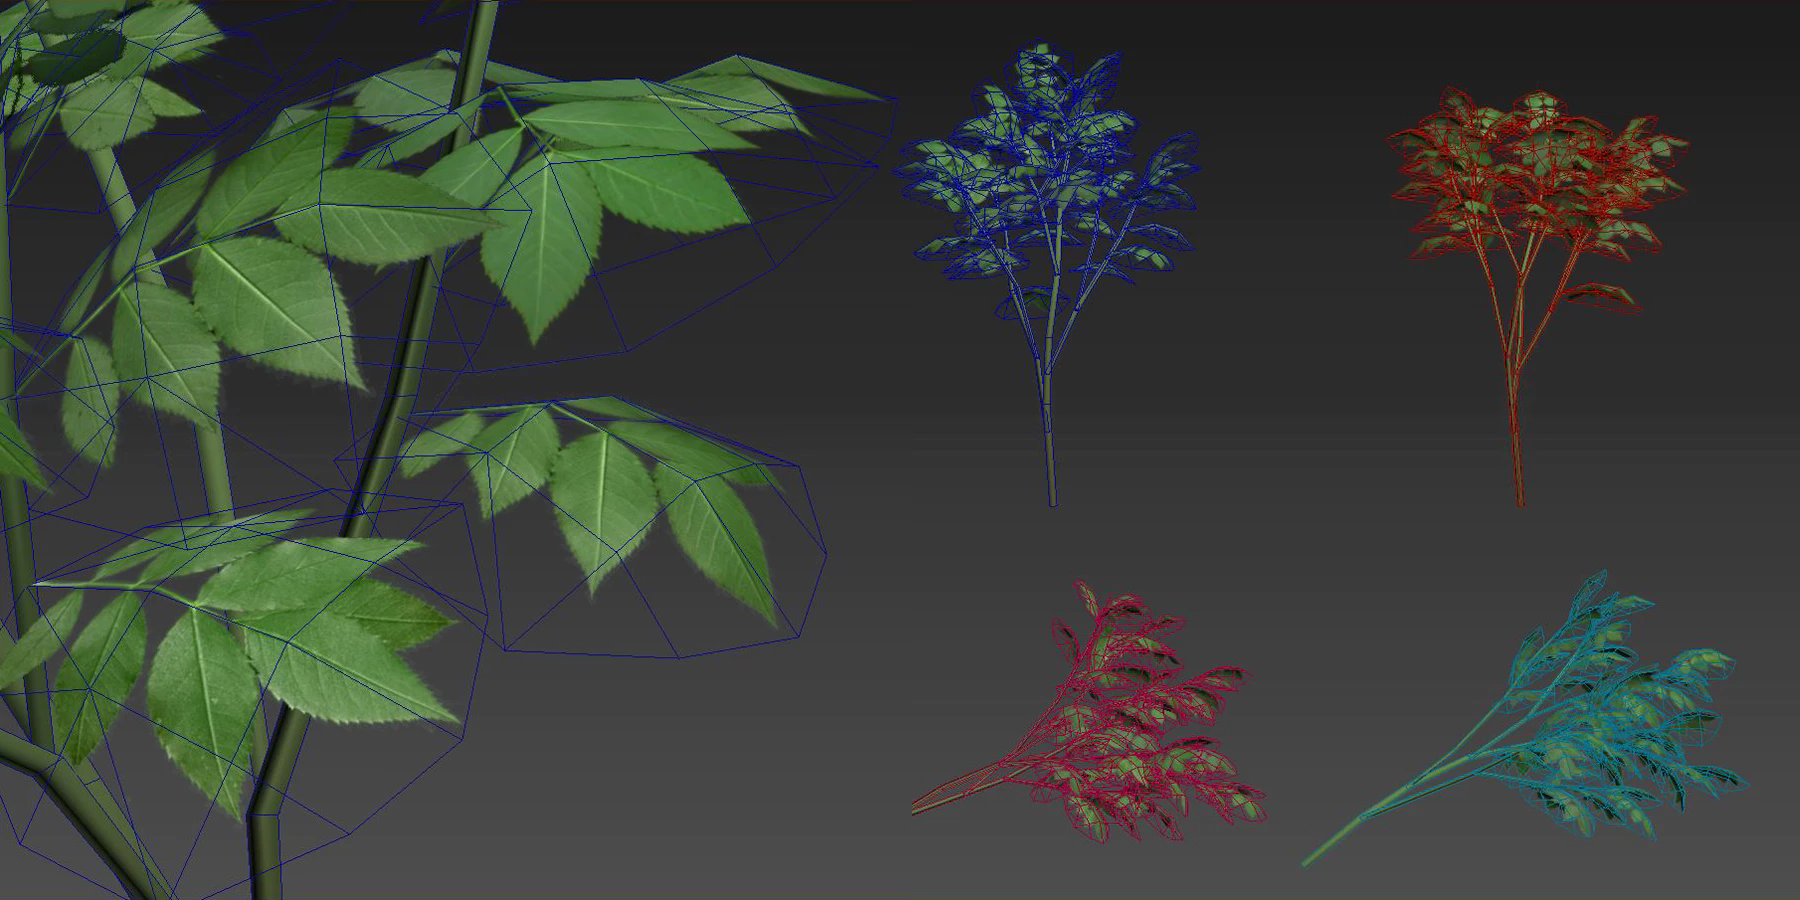
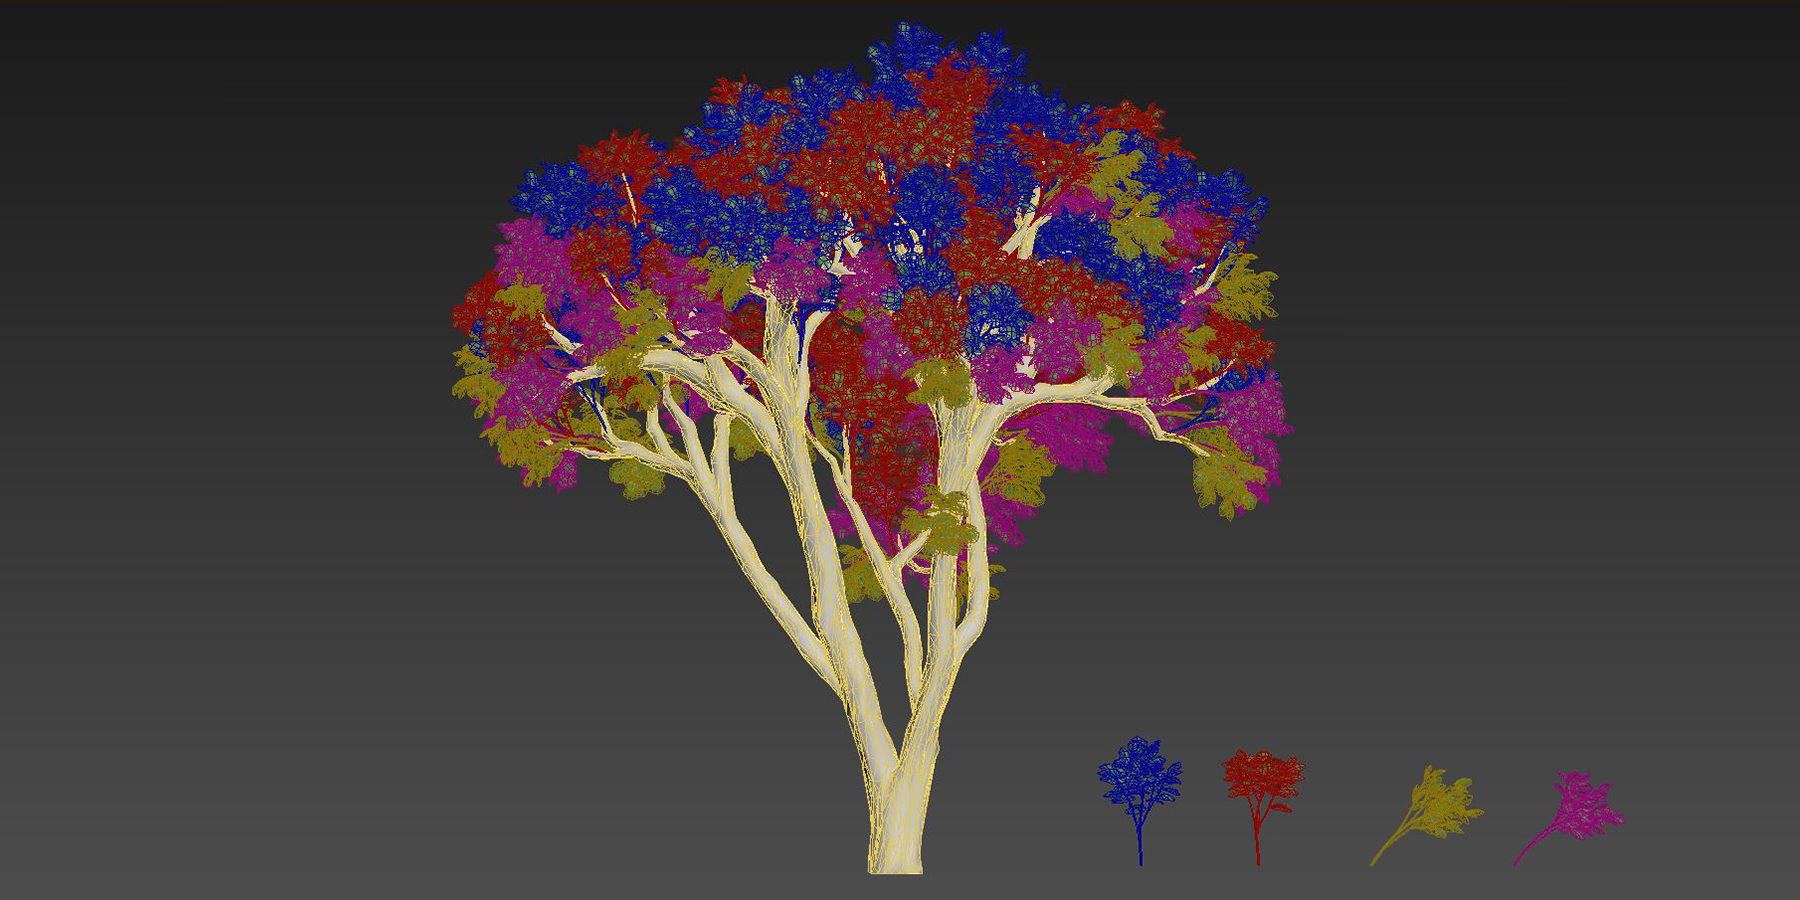
This is the final part of the project. I created 4 leave textures. Map the leaves texture to a curved plane. Then modeled 4 branches, 2 for standing more than 45 degrees on the main branches, and 2 for lower hanging on the edge. Randomly populated the leaves plane on them. Then, grouping them together and merge them into main trunk scene, and placing them along the main branches.
First, I have created a cluster of leaves. Using a few leaf textures, I created four textures with slight hue differences and mapped them on a curved plane.
I made the Normal maps with ZBrush’s surface conform their diffuse texture to a plane, then bake the Normal Map after adding a few undulation on top of it. Previously I tried to model the actual same cluster of leaves, which given very favorable result in the test render, but I chose this way because of the poly count factor.
Then, to create the small branch, I drew a rough guideline and modeled the tree branch loosely based on it. Make sure it spreads out evenly.
I also created two branches modeled as they lean to one side. So the straight up branch will be used in the center or when it stands more than 45 degrees on its main branch. Leaning branches will be employed if it has a small angle with the main branch or hanging down from the main branches.
Final Step
Upload the final model to Sketchfab and import all the textures. Link all the textures together, adjust the lighting and color in the editor.
It took slightly longer time than I expected, but it can be faster with more familiarization with the workflow.
This project helped me to understand the whole process, and I enjoyed picking up the technique I overlooked before.
Overall, I think this workflow can help artists to create more realistic assets for their projects.
Hope you enjoyed it.






hi
My name is Offor Emeka. I am interested in developing my skills more in the aspect of structural/Architectural design and rendering using autocad, revit architecture and Photoshop. Your advice is equally need. I want to further my tutorials with VRAY if possible.Anticipating the reply