Hair & Fur in 3D Studio Max
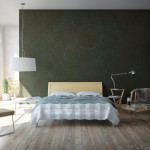
Following a great thread in the finished works section of the forums, pixela was very kind to send me a little ‘How-To’ about the the use of 3D Studio Max’s Hair & Fur modifier you can see on the chair in the image above. I hope you’ll enjoy this article, even though it is just a small taste of what could be achieved with this great modifier.
 Author: Alfa Smyrna (pixela)
pixela is a freelance computer graphics artist living in the west coastal region of Turkey, formerly known as Ionia. Graduating architecture studies at METU School Of Architecture to discover the passion CG, pixela now specializes in 3D computer graphic arts production. check out pixela’s personal blog with more tutorials and great info at: www.pixela-3d.com
In my 3d interior visualization scene ‘Bedroom Concept’ I had one chair with fur which many people asked me to write a small tutorial about. Here I will try to explain the process of making it using 3D Studio Max internal Hair & Fur modifier.
I used poly modeling techniques for creating the chair, but I won’t elaborate on that any further since I’m focusing on the use of the Hair & Fur modifier I applied on the chair after I finished it’s modeling.
Adding the Hair & Fur modifier
So… While the chair is selected, from the modifiers panel, you add Hair & Fur modifier (under World Space Modifiers). You can see the parameters I used in the image below.
Initially, the fur will not look like it is in my image because you have to ‘Style’ it first. This step makes the fur look much more realistic as you comb it with a brush, setting the strands in place. When you click on the Style Hair button, you will see the hair guides. You will then shape these guides with the brush and the fur strands will follow your movements.
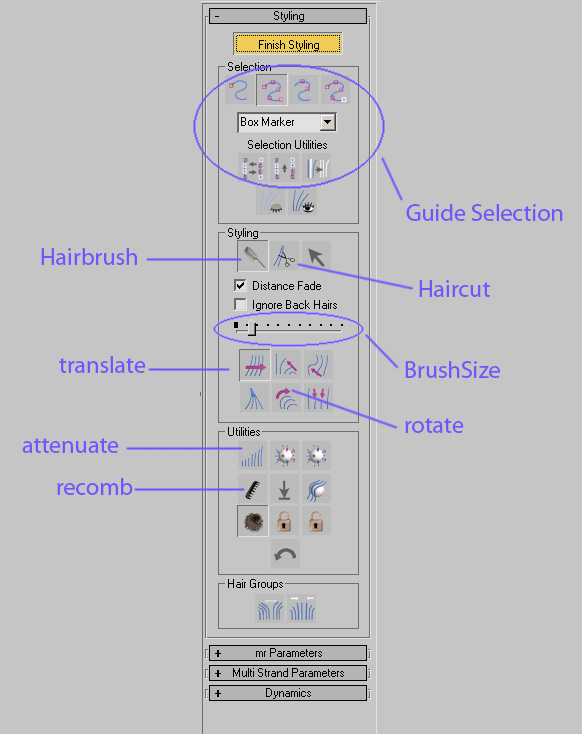
First you should start with adjusting the size of your brush. You can then select hair guides individually or in groups. The selection menu is very detailed.
The process of ‘Styling’
At first, I selected all guides and tried to give the general look I wanted. In the second step, I selected guides in groups and continued brushing. For fine-tuning, you can even select edges or roots of hair or single vertex like in sub-object mode.
Under the style roll-out, there are many tools as you see in the image above. You will use some of them to brush the fur.
Here I pasted some of the definitions for these tools from the 3dsMax help file
- Hair Cut – Lets you trim the guide hairs. To cut hair.
- Translate – Moves selected vertices in the direction that you drag the mouse.
- Stand – Pushes selected guides toward a perpendicular orientation to the surface
- Rotate – Rotate or swirls guide hair vertices around the cursor location (at the center of the brush).
- Attenuate Length – Scales selected guides according to the surface area of underlying polygons.
- Recomb – Makes a guide parallel to the surface, using the guide’s current direction as a hint.
- Clump – Forces selected guides to move towards each other (drag mouse leftward) or farther apart (drag mouse rightward).
Now you start combing your hair, cut it where you need. As you brush, you will see that the fur changes shape. You can move the strands in any direction you want, rotate them individually or in groups, clump them so they can move towards like a bunch. You can shape up your fur according to your imagination.
Hint: It is easier to understand when trying to make it. Here, it sounds more complicated than it is. Start brushing and play with the tools and you will see the results in the viewport preview.
Here is the result after I styled it:
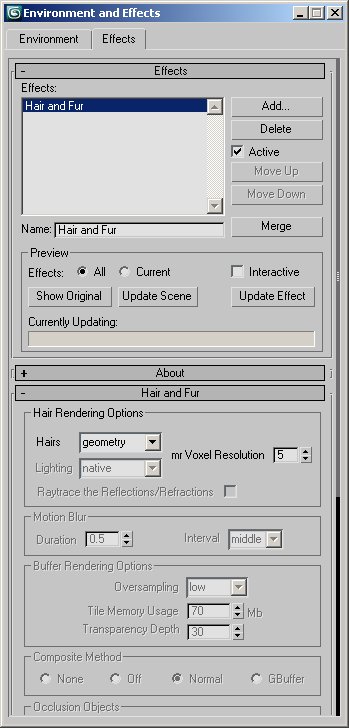
Don’t forget to turn on the Hair & Fur effect from the Environment and effects roll-out. You can disable this to save RAM when the fur object is not visible to the camera.
The ‘Bedroom Concept’ Image Set
Original Finished Work Thread | Original Work In Progress Thread
You are welcome to comment on this article and ask questions using the comment box below!








Its an amazing tutorial. Most realistic render thank you.
simple, but usefull tutorial/introduction =)
Thanks Pixela & Ronen for this =)
this place is getting better ‘n better with time.