


Tomorrow Challenge entry by User-62662534
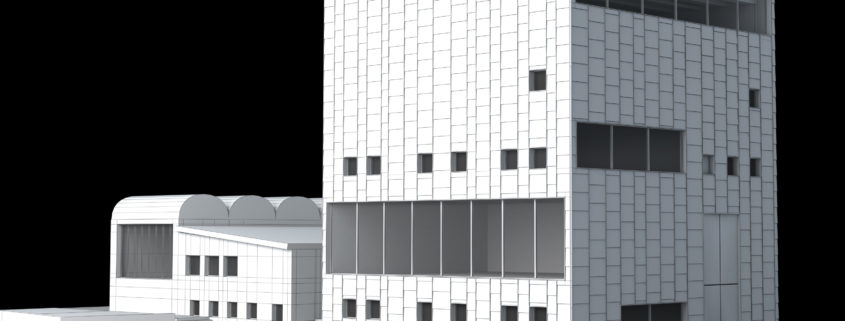
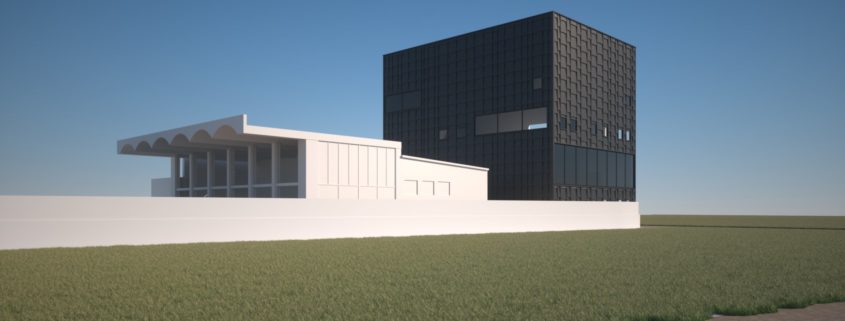
Here is an overview of my modeling of the building, I only model the facade visible on my angle of view.
Access the Best Articles about Architectural Visualization. Learn about all aspects of crafting images that tell stories.
Making Of's Case Studies WorkflowsShare your work and get immediate appreciation through discussion, feedback, and a possible nomination for the…
![]()
A weekly experiment, exploring the creative minds in Architectural Visualization and more. Find out what makes us all tick and push the limits.
Listen Now! Subscribe on iTunesOut with the old and in with the new! In Converted, I’m asking you to take an in-depth look at existing architecture near you or one you love worldwide and introduce something new.
See Entries & Join! About ConvertedHere is an overview of my modeling of the building, I only model the facade visible on my angle of view.
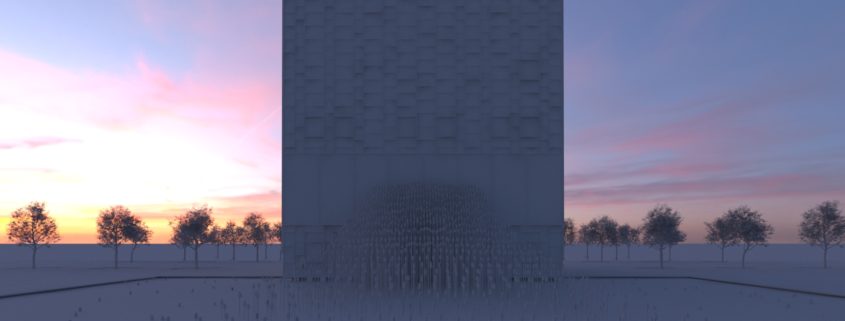
Following last update I have proceed to modeling stage. Attached white model with a simple sky dome. I have sketch a dozen of different composition before I was satisfied.
I have made a variety of candle light container and render in simple white. I used multi scatter the vray proxy to save some memory. After several test I am sure my machine just couldn’t scatter too many at one. Therefore I have separate them into different pieces.
There will be quite a bit of back and forth when I do texturing and lighting next.
Cheers.
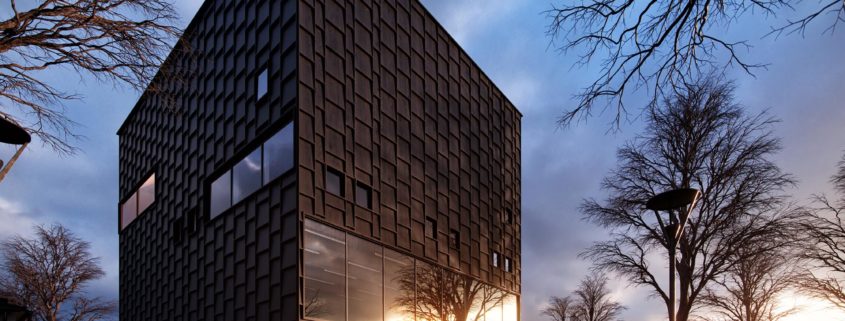
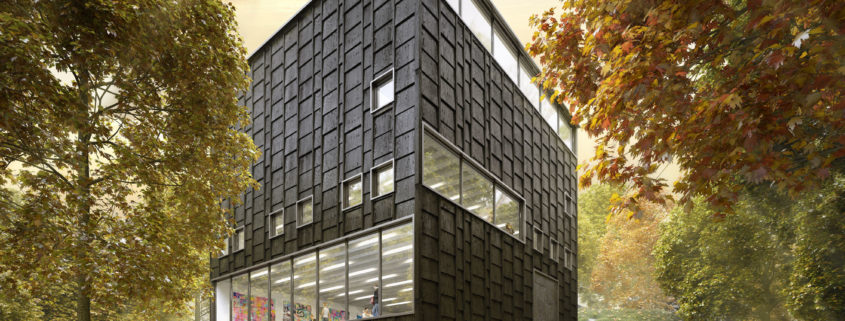
As i mentioned above the project was much enjoying. I started creating the concept simultaneously sketching out the building across some concept. I started all the way downloading the reference from the Internet, then studied the images with respect to the amount of detail required and the logical measurement of the building.as i began the modelling of the building the detaisl was little tricky but solving those was really enjoying, then i moved on to testing the different lighting mood for giving a best autumn feel after that i moved to the shader part in this time very well understood the coronaAO map, and its implementation aswell the parameters, the black facade shader wasn’t easy enough though i broke it down. moved to scattering up of the vegetation using the forest pack, shading the environment details, optimizing the scene. then i did some draft test at high resolution to accurately finalize the scene had to do some tweaks. then i was happy with the shader, composition & illumination, i hit the Render button, but seriously i hit it hard but not that harder that could break my keyboard ha ha. it almost took some 5 hours to render 3600px on my machine , i took the render into the photoshop did some highlight tweaks, tonal contrast, chromatic aberration & some color balance. I dint needed much post and my RAW render had all the beauty. I would like to thank ronen & tomorrow for this event
I know I’m a little late to be posting the basic model while people are posting test images. But better late than never right? So I had completed this model a week or so ago. I started out the project by first studying some of the images as the blueprints were a little baffling to me. By baffling i don’t mean i don’t understand them, it means i was trying to understand the concept and flow of the building. At first glance it appears a simple enough structure, but when getting into the details it was a whole lot more interesting. So after basic understanding i was able to make the DWG plan of the building a lot faster as i knew the composition of the structure and knew which interior elements were to be plotted. Making the drawings only challenge was matching the scale of the blue print to the actual plotting. I saw the (very small and invisible scale after much googling) and then scaled the image to a simple line of actual length to that of the image’s scale. Another annoying thing was that the elevation prints were not all the same size and i had to scale every one of them to the real world measurements. After that I imported the structure to max and after a simple spline extrude, Lo and behold the walls were up!
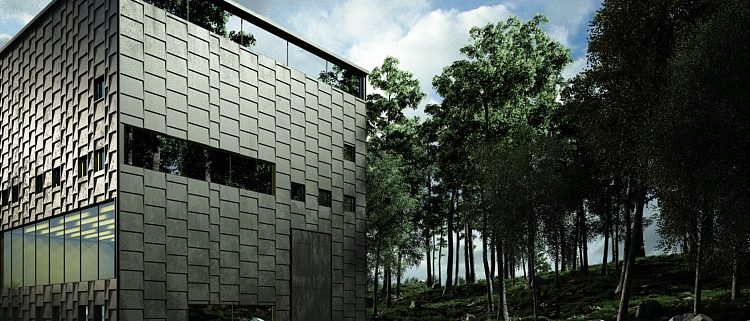
After that a simple process of cross checking the windows, i added in the above-below. After that came the real time cruncher, those pesky panels. Constant referencing to the images was required as the blueprints didn’t have the layout of the panels. So, needless to say opening the photo viewer and then max and then again the images was irritating. I eye balled the measurements from the images in reference to the window placements and the adjoining panel heights. This done my model was basically done. I decided this angle for ease of modelling( i know, i know) but it made for an interesting angle and the reflections were not to be thrown away. A simple forest pack grass prefab ( first time using Itoo softare) and my basics were done.
After a few lighting trials in HDRi, i got one i sort of liked, maybe i’ll change it later on if i don’t like it much. Synced the vray sun with the HDRi for accurate shadows, after a while the right hand side was given a meadow, this time using a more detailed and finer hand picked models to fill in and a good amount of time tweaking, i was getting the hang of forest pack and it was amazing, after the scene was set, i present to you some of the test renders over the time period.
I don’t have a concept image as yet and ill be making one by tomorrow i hope. The test images are far from final and i need to buck up,
That’s all for now, stay tuned for more! ( I hope!)
First thing I did was block out a model with a few boxes to get the overall shape. After that I made a quick painting on it in photoshop to start to study the composition. My first idea has changed though concerning the composition. I wanted to have the baltic sea in the foreground but I realized that I was further from the museum then I’d like to be. I decided to tilt the camera and use the paths to draw the eye to my focal point. I plan to introduce snow in the image and will most likely be working with an early morning or late afternoon light.
I’ve really enjoyed working on this project – I’m used to doing mostly interior and product renders, but have always wanted to do much more exterior work, so this challenge seemed like a great opportunity to learn some new tricks. Working on the landscape elements has been great fun, and spending time getting the building exterior materials ‘just right’ has taught me lots too!
I set myself a strict time limit, and spent much more time experimenting with post production than I normally do. I’m pretty happy with the final image.
Thanks to Tomorrow and Ronen Bekerman for setting this challenge – it has been lots of fun!
Good luck everyone!
Cheers!