


Tomorrow Challenge entry by User-16555445
First DSLR.
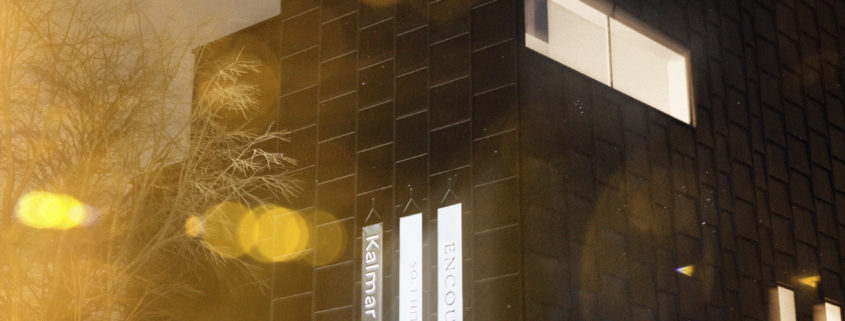
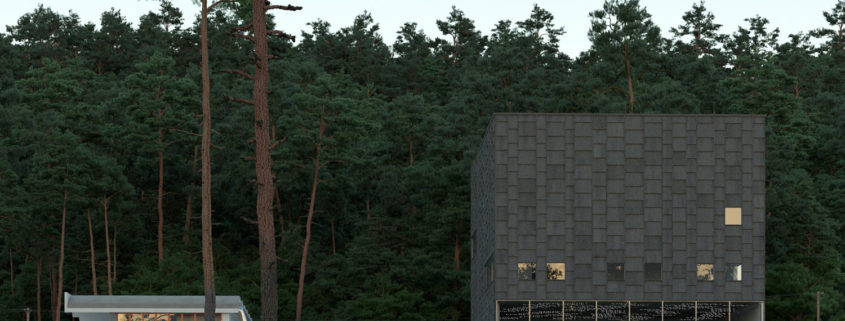
The idea here was to create imitation of bad DSLR setting, shaking hands, flash, noice, etc. The scene is full CGI.
Access the Best Articles about Architectural Visualization. Learn about all aspects of crafting images that tell stories.
Making Of's Case Studies WorkflowsShare your work and get immediate appreciation through discussion, feedback, and a possible nomination for the…
![]()
A weekly experiment, exploring the creative minds in Architectural Visualization and more. Find out what makes us all tick and push the limits.
Listen Now! Subscribe on iTunesOut with the old and in with the new! In Converted, I’m asking you to take an in-depth look at existing architecture near you or one you love worldwide and introduce something new.
See Entries & Join! About ConvertedFirst DSLR.
The idea here was to create imitation of bad DSLR setting, shaking hands, flash, noice, etc. The scene is full CGI.
I spent a lot of time to choose between my two concepts so i created a new one) I thought its could be interesting to put my building in some kind of urban environment. Then i found photo on pinterest with intresting simple composition. I draw a quick sketch and started work on it.
Making-of video:
https://dl.vnplugin.com/vn/Downloads/makingof.mov
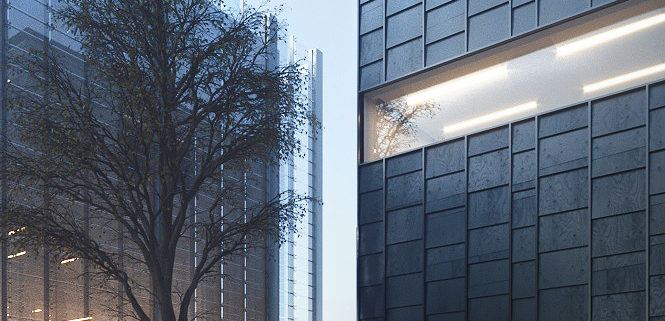
The main goal of simulation in this project is to make an angle look as exactly same as the reference photo. At the beginning, by using Camera Match, the camera was adapted to the desired angle. Also, it was done with the camera facing the front of the building in order to draw the correct volume without checking the plan of the building. After modeling the main parts of the building, the trees, floor and electricity pole were modelled.
To model the soil, meshing was increased and Displacement modifier was used. Then, ProOptimizer modifier was used to decrease the meshing. It will be lighter than the VrayDisplacement at the time of rendering.
For creating water cavities, a copy of ground was made and Relax modifier was used. After that by the help of Scanline, the Top view was rendered in Grayscale mode and then some changes were applied in the Photoshop.
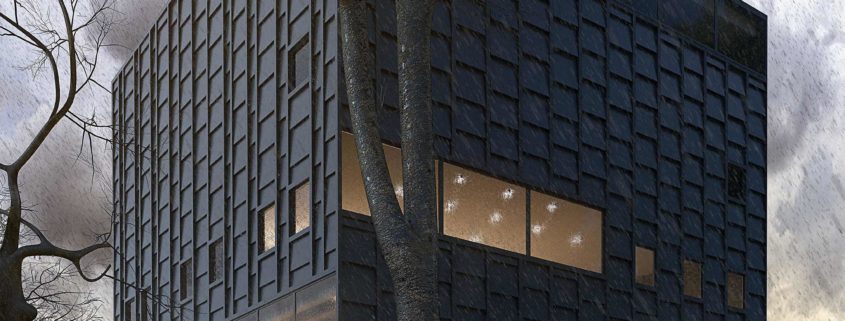
PFSource was used to create the rain. Due to heavy rendering, plans with opacity were used, and to insure exact rendering, the amount of Max Transp. Level in VRay rendering was raised up to 200. The Spawn parameter was used for modeling the effect of raindrops hitting the walls, trees and the ground. Unfortunately, due to the large size of data, the collision effects were changed into polygon. Thus omission of Motion Blur at the time of render and slightly reducing the quality of the project.
Different modes of different particle types were used to create the effect of falling raindrops from the trees and the walls, but unfortunately none of them have the desired result. At last, they were modelled by Polygon and animated in different modes and using the PFSource they were put under the bottom of the objects in the scene.
Forest plugin was used to create grass. The mired grass in the water cavities were deleted.
For lighting, just one HDRI light with relatively low intensity was used. The same light with different angle was used to create the reflections. All of internal lights are VRay Plan Light.
ZDepth and ObjectID were used as render element. By using ZDepth some depth-of-fields was added to the scene and also it was used to create Fog. To choose different parts in Photoshop, the ObjectID element was used. But unfortunately, because of MotionBlure, it was not useful to choose the raindrops.
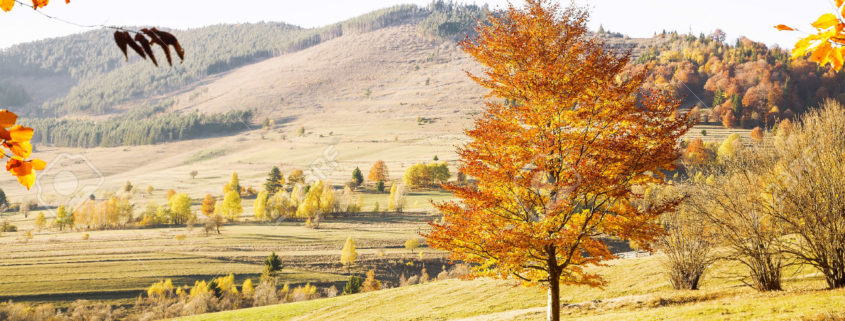
i started with a hand sketch witch i stylized with photoshop for a general look and feel of the image i wanted. i Took a photographic and storytelling approach so the building wont be as close up but the idea is for it to be very impact full thanks to using a semi analogous color pallet. i did i fast ps composite to check some details but i disliked the gloomy feel, i wanted something more alive, colorful and happy. i started working on the environment mainly the long and golden grass i wanted and the orangy autumn trees.
When the shading stage arrives I always think about what are the most important materials of the image so I can focus my efforts on them.
In this case, in order of importance, the wooden planks of the museum facade would be first. Closely followed by the soil and the foreground vegetation. In the last position we have the white plaster and the concrete that dress the restaurant.
To create these materials I used substance designer (all of them but the terrain shader that was done when modeling the environment). I wish I had known the existence of substance before. Incredible! It greatly shortens the process of creating materials by its real-time viewer and also makes very enjoyable and fast creating materials with it.
For the facade I had some textures that were almost perfect. The only problem were the wood knobs. I got rid of them via photoshop in no time and everything was ready to jump to substance. There I created the specular, glossy and normal maps from the diffuse. Once I had the node tree I replaced the original bitmap with the 11 different difuses and suddenly I had 11 full maps ready to load to multitexture to avoid repetition. (images 1 & 2)
For the vegetation I have used forest color. Also very powerful. I have used its function of taking values from a texture and “tinting” the elements (leaves) of these random values. That is, a good randomness in a single click. Magnificent.
To help set the mood of the image I have resorted to several free 3d models that I have textured very simply as they appear in third plane.
The summary of the shading phase would be: Substance designer, forest color and references, lots of them 🙂
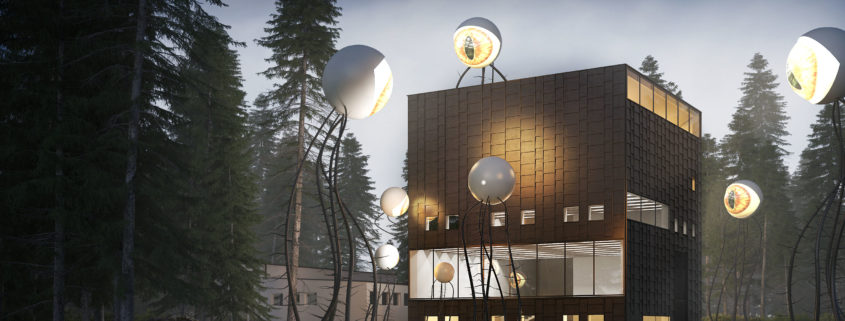
I started the project with the desire that the building would be lit by something else than standard lights so i created a story. The story should attract it’s viewer both compositionally and for its meaning